
An easy guide to making your own delicious and healthy pizza at home with all real food ingredients. With practice, this can easily become a frugal and enjoyable memory-making experience for your family!

Friday night pizza night is a must at our house! There’s nothing worse than Mom being too tired to make pizza and 1) making something totally different or {worse} 2) getting carryout pizza *gasp*. Really, the longer I consistently stick with our pizza night tradition, the more groans I get when the occasional pizza order makes it into our house. My children are so funny, they’ll lament, “Mommy, this is yummy, but your pizza is SO much better!”
Carryout pizza used to get jumping and joyful shrieking responses, but not anymore. My simple, no-fuss pizza has become one of the most looked-forward-to meals around here. I’m hoping it can become that in your home as well and that this guide helps you achieve that!
Homemade pizza is such a fun part of embracing a simple living lifestyle. In the midst of a culture that prioritizes speed and convenience over all else, taking the time to make pizza at home is a way to kind of take that back and remind ourselves and others that home should be the shaper of culture, not the other way around.
This is a great recipe to start with because it it is very simple and no-fuss, with no kneading or rising or soaking involved. Now, my favorite way to make pizza is sourdough because of the health benefits. But this is a great fall back recipe for when I’ve accidentally killed my sourdough starter again, forgot to feed it and grow it up in time, or have unexpected company and need more food quickly! It’s also less intimidating to start with.
This makes a somewhat fluffier, lighter crust than sourdough as well, so it’s very helpful for beginning to retrain your family’s taste buds to healthy real food if you’re currently in that stage. The more all-purpose flour you use, the lighter it will be. So play around with it and see if you can’t get by with a higher amount of whole wheat flour over time!
This post contains my personal Azure referral link so I could make a small amount from purchases you make from them.
Ingredients:
- 3 cups warm water
- 7 teaspoons active yeast
- 1/3 cup olive oil
- 1 tablespoon coconut sugar
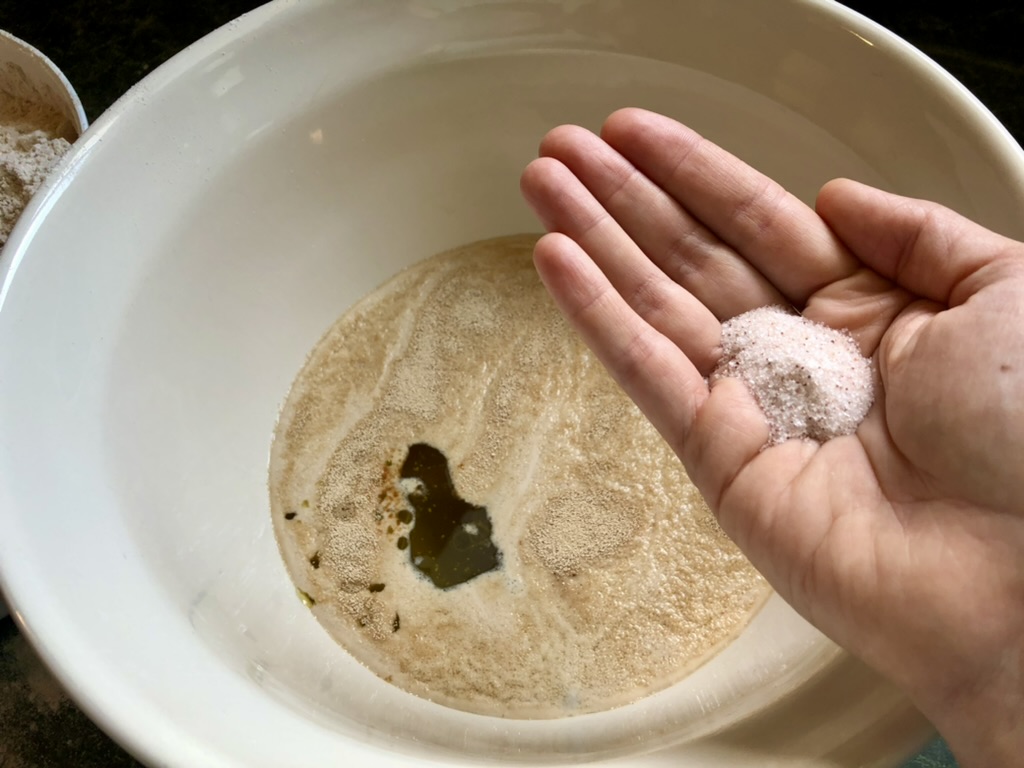
- 1 teaspoon of salt
- 8 cups flour (whole wheat, unbleached all purpose, or a combination)
- Garlic powder, basil, and ground thyme (optional, for seasoning the crust)
- Sauce and toppings (see FAQ below for ideas)
Tools You May Need:
- Large mixing bowl
- Measuring cups and spoons
- Large spoon (or optional dough hook) for stirring
- Serrated knife (optional, for dividing dough)
- 2 large sheet pans (I have these ones and love them! You could also use large cookie sheets and your crust will be a little thicker)
- Pizza cutter and spatula for serving
What are the steps to make pizza at home?
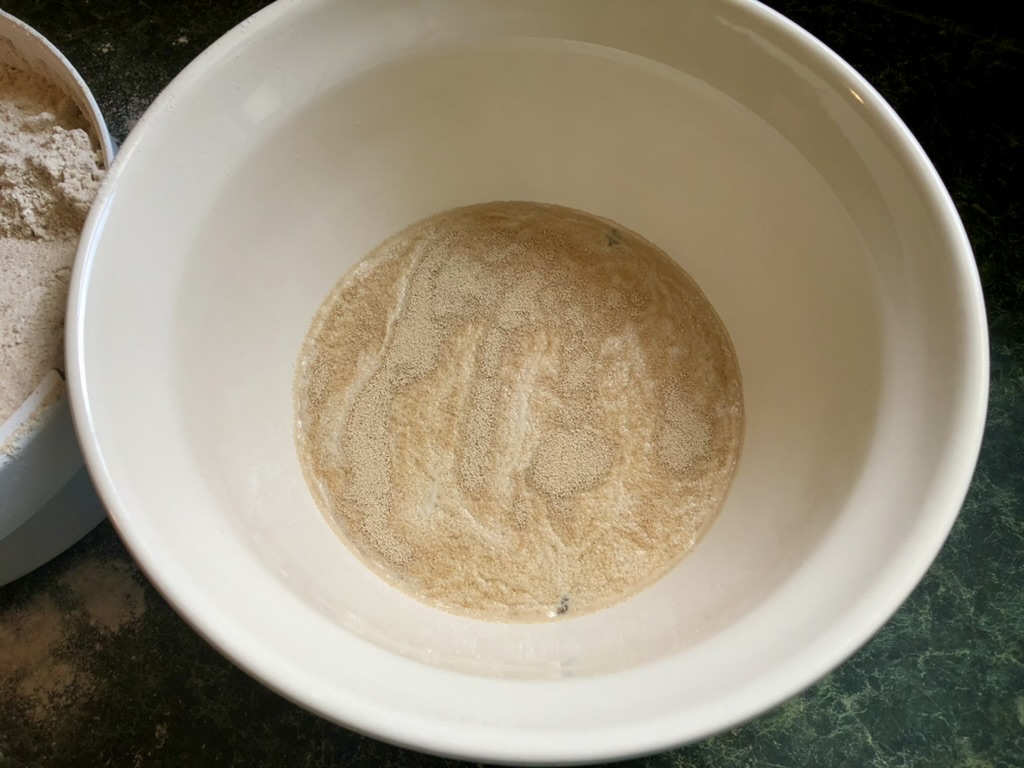
Step 1: Proof your yeast.
First you want to proof your yeast to make sure it’s active to make your dough rise. This isn’t as important with pizza as it is with other yeasted recipes, but it is still essential unless you prefer more of thin, crispy crust.
I personally don’t do this every time because I buy my yeast in bulk (once a year or less) and store it in the freezer. This ensures that it stays active long term. I highly recommend storing even smaller amount of yeast in the freezer for this reason. But if your yeast is new or has been stored in the cupboard this is definitely an important first step.
Add your warm water to a large bowl (I find that the hottest my tap water go is perfect for this). Sprinkle the yeast on top, and let sit for about 5 minutes. You want to see it foam up at least in spots.
*This is also a good time to preheat the oven to 425 degrees as well!
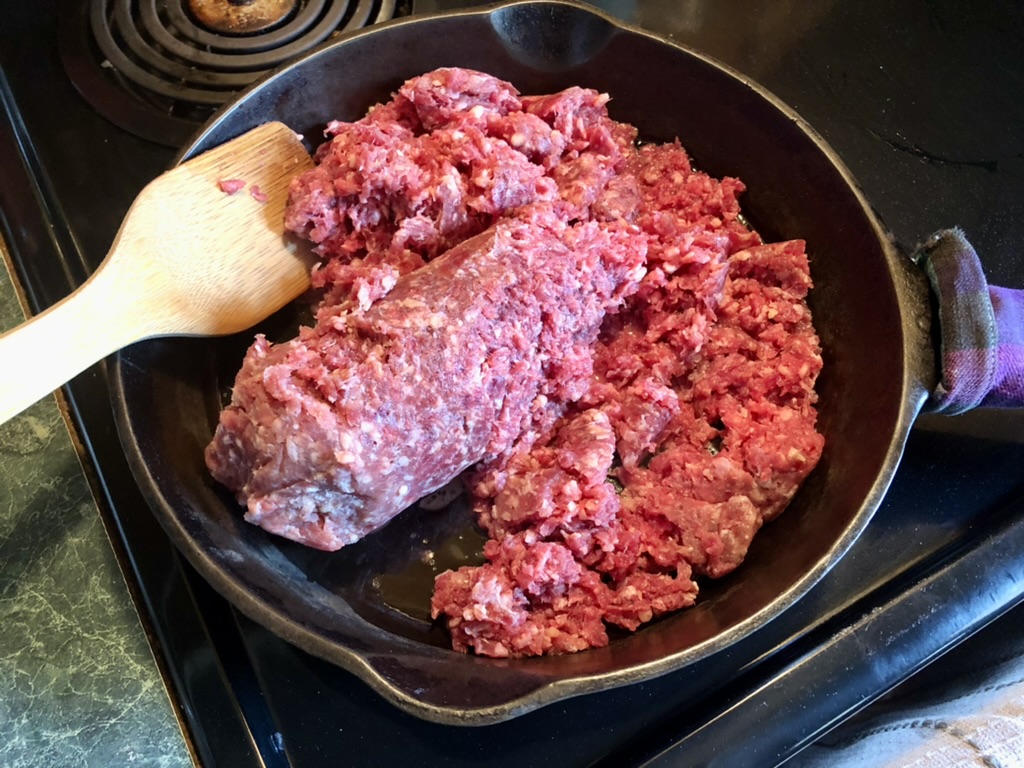
Step 2: Start prepping any toppings that take time.
This is when you’ll want to start cooking up any raw meat for topping the pizza. If you want to cook any of your vegetable toppings before putting them on your pizza you might want to go ahead and chop them now. If you’re using leftover cooked meat, pepperoni or salami, and/or raw (or no) veggies, you can skip this step.
To be honest, I usually use raw veggies (or none if I’m in a hurry and we just eat a side salad) and often forget to start cooking my meat till somewhere in the middle. You’ll figure out what works for you as you practice and learn to adapt the steps depending on what type of pizza you’re making each time.
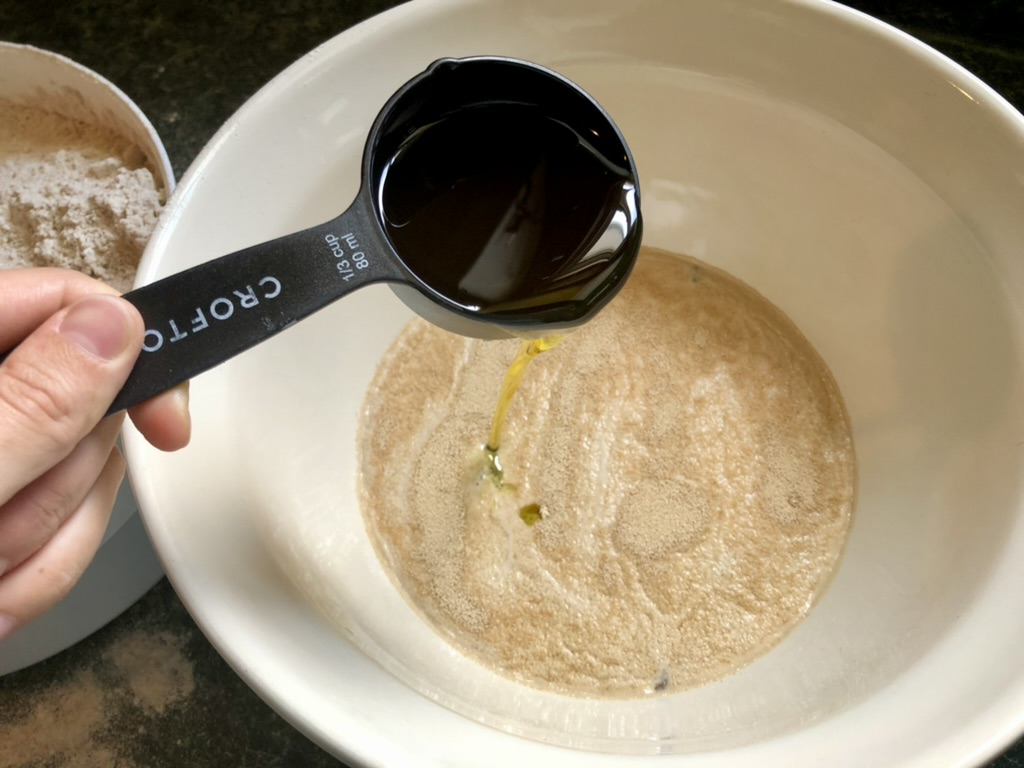
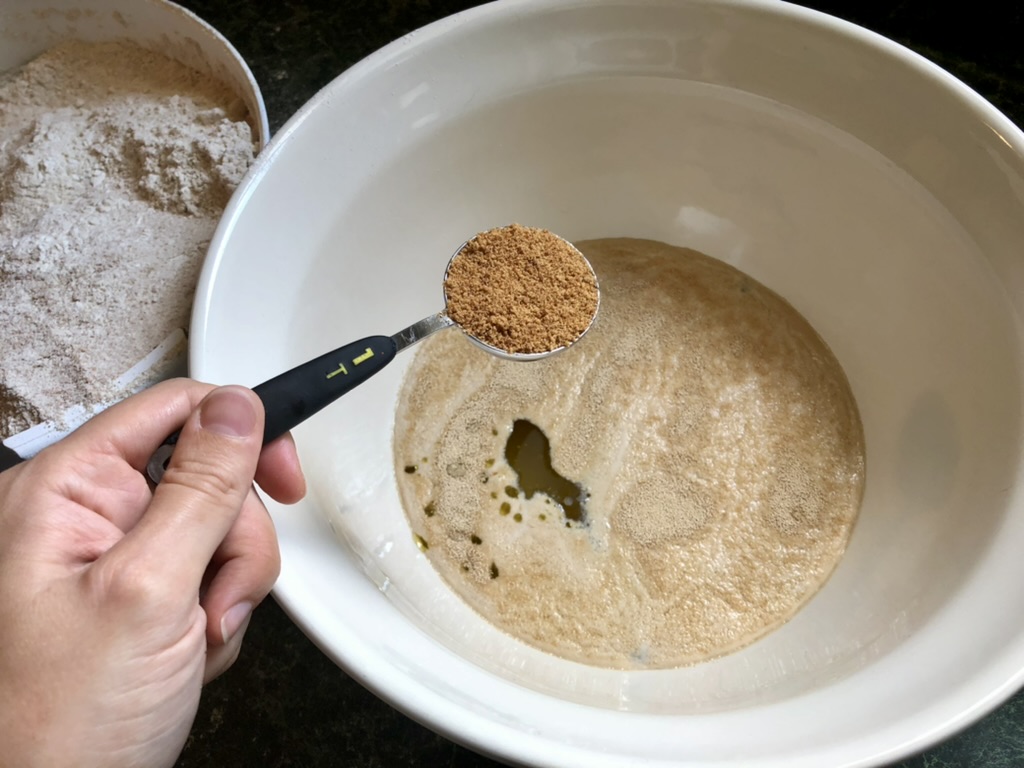
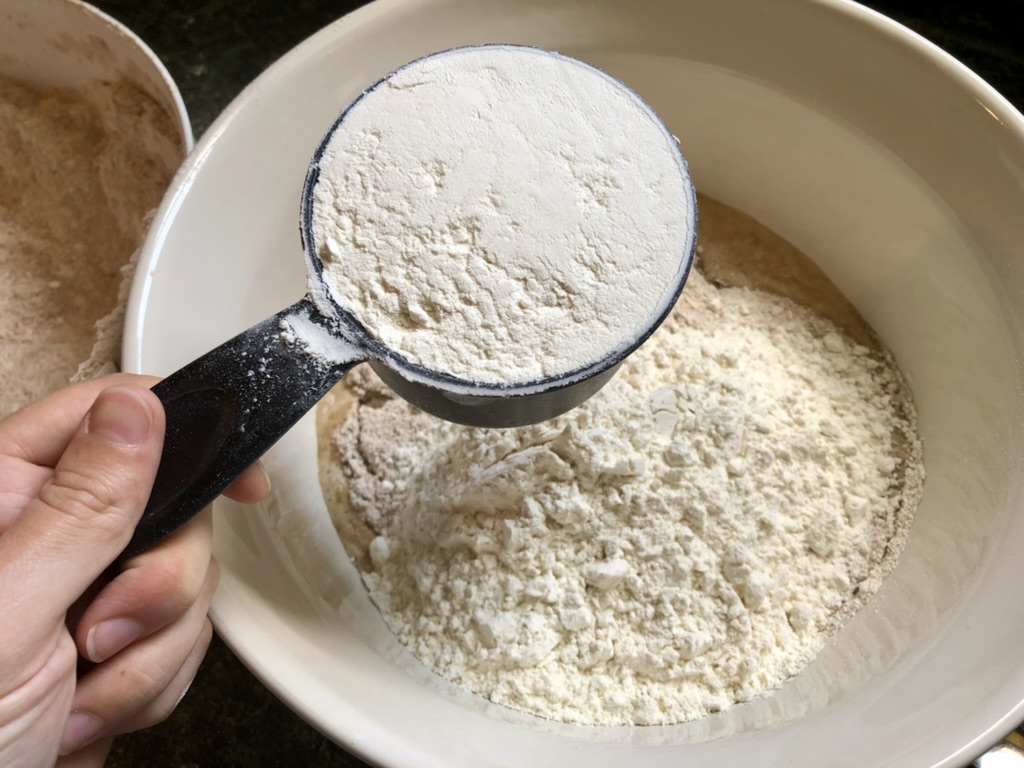
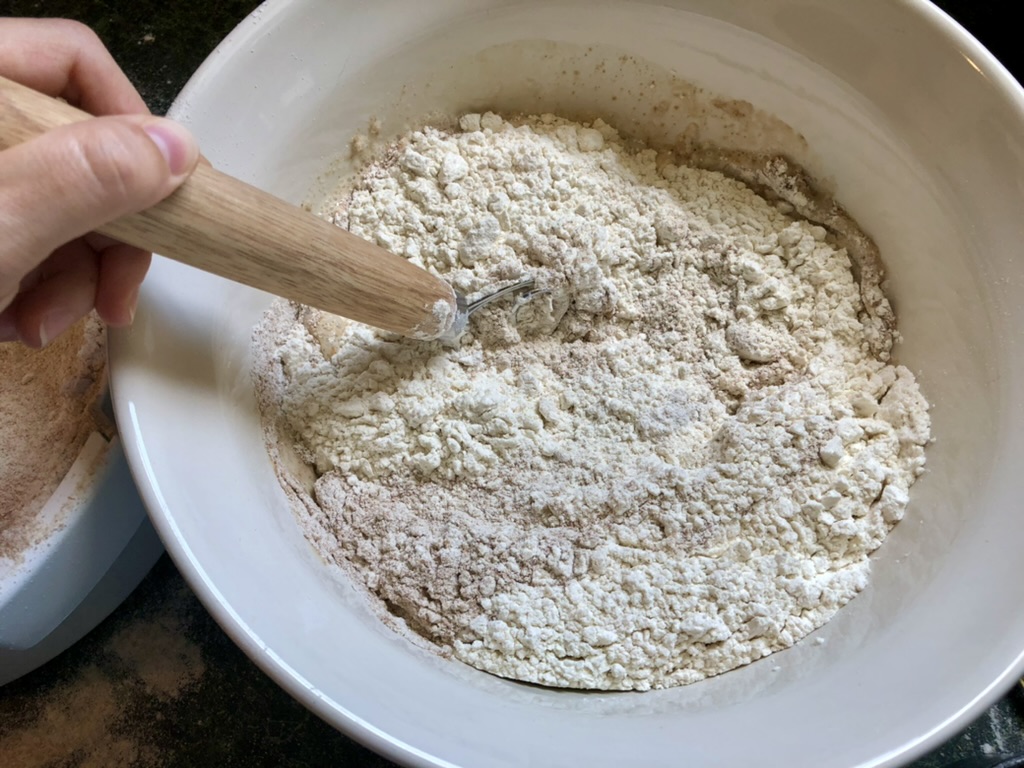
Step 3: Add the remaining ingredients to your dough.
Add the olive oil, coconut sugar, and salt.
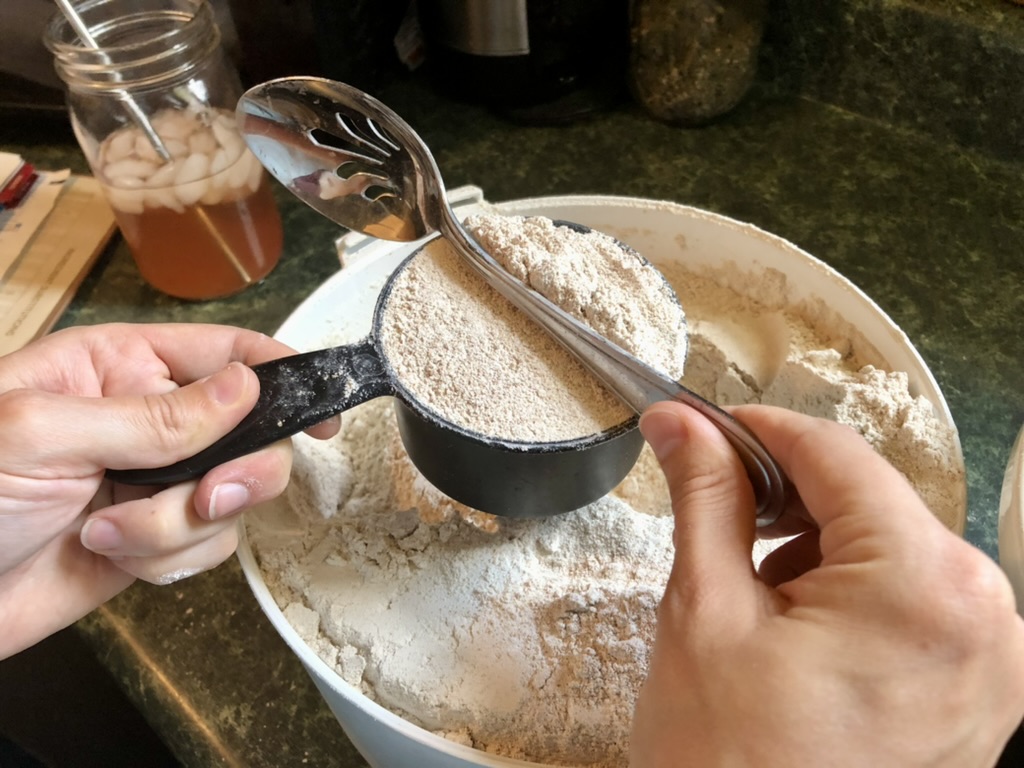
Add the flour. In the first picture below I show how to properly measure your flour. You want to use a spoon to fill your measuring cup and then level it with the spoon handle or a butter knife.
I used a mix of freshly ground whole wheat and unbleached white flour this time.
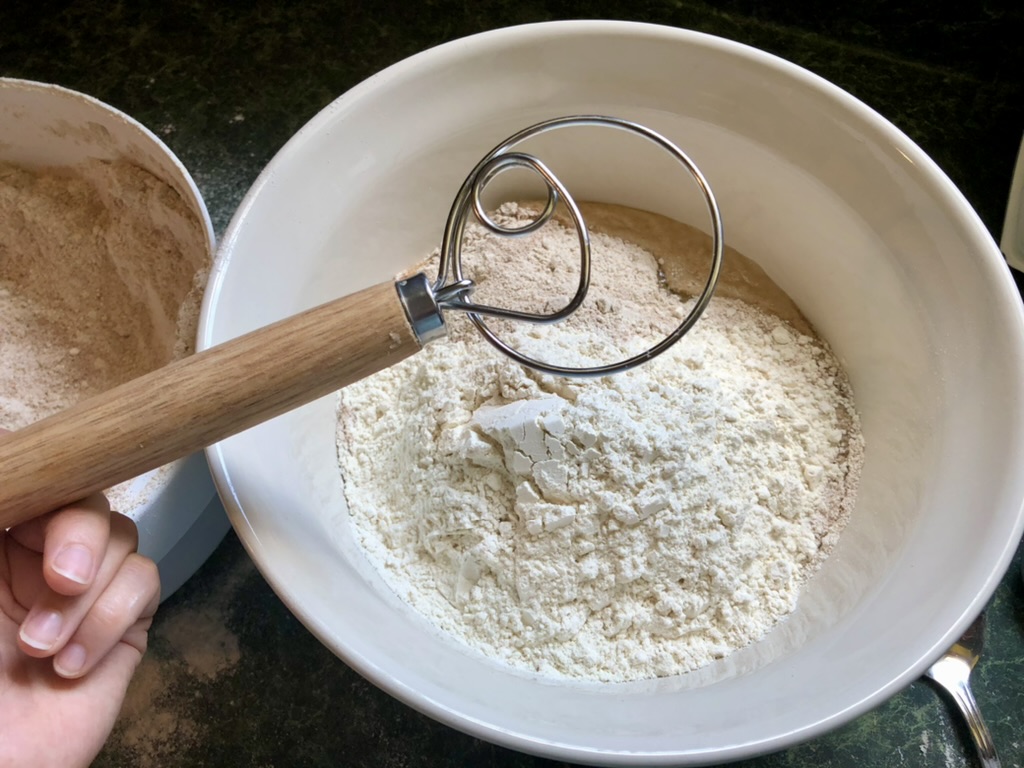
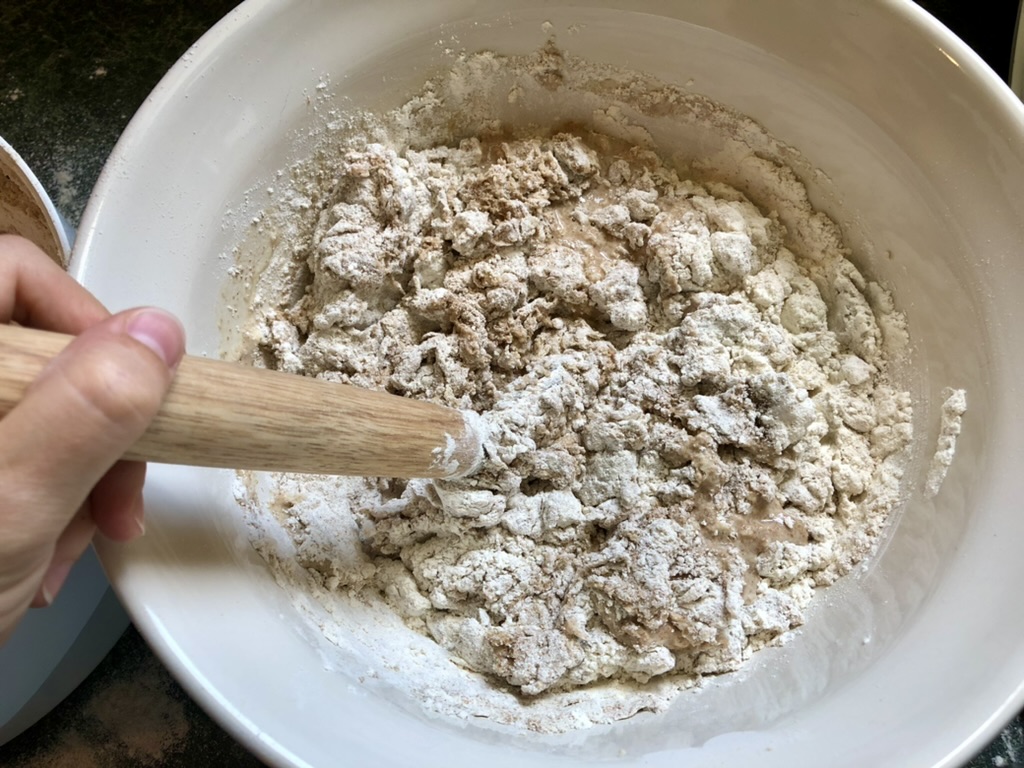
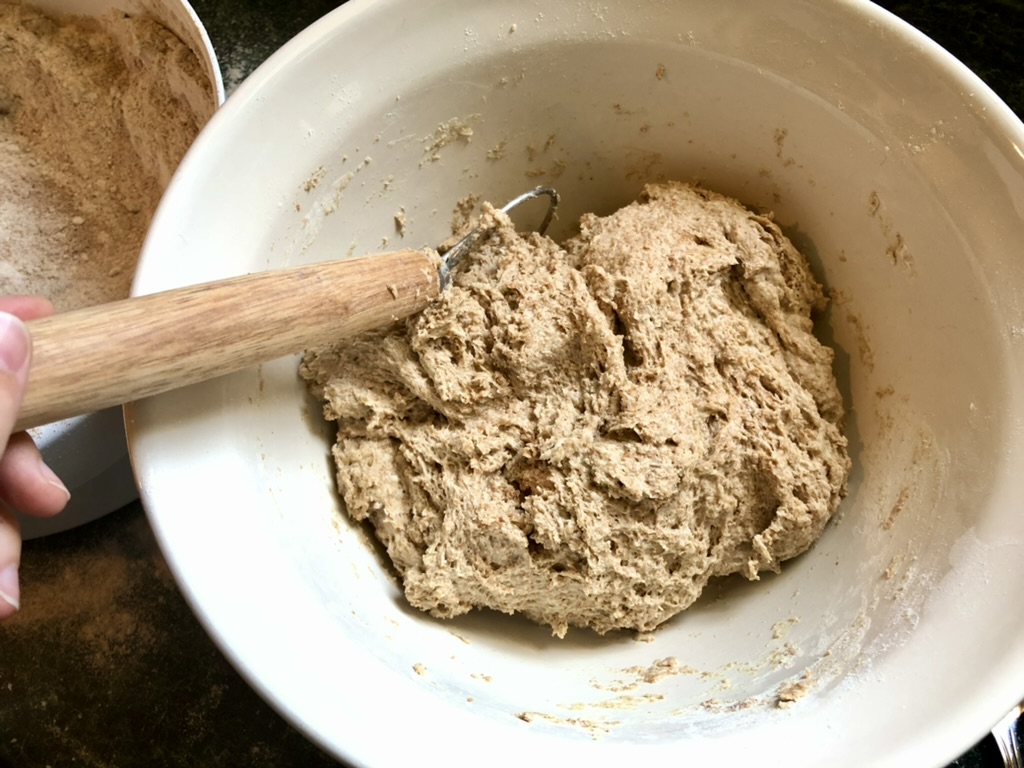
Step 4: Stir well.
My favorite (but not necessary) tool for this step is a Danish dough hook. I wish I had gotten one a lot sooner than I did. It brings the dough together quickly and surprisingly easier than a spoon does!
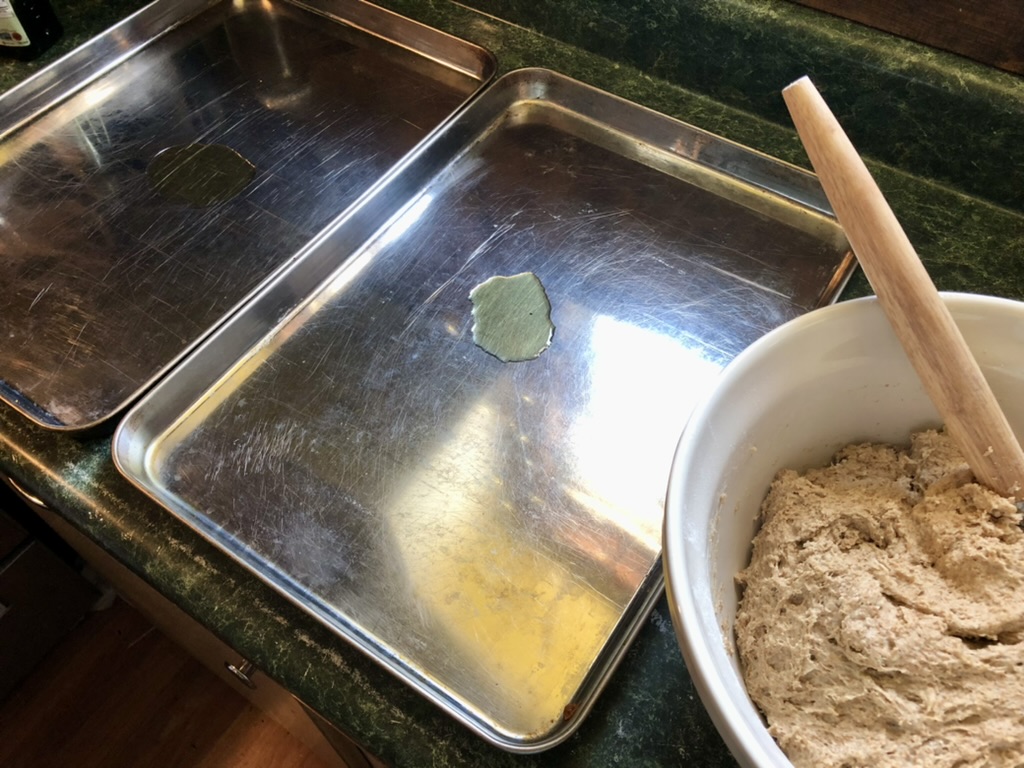
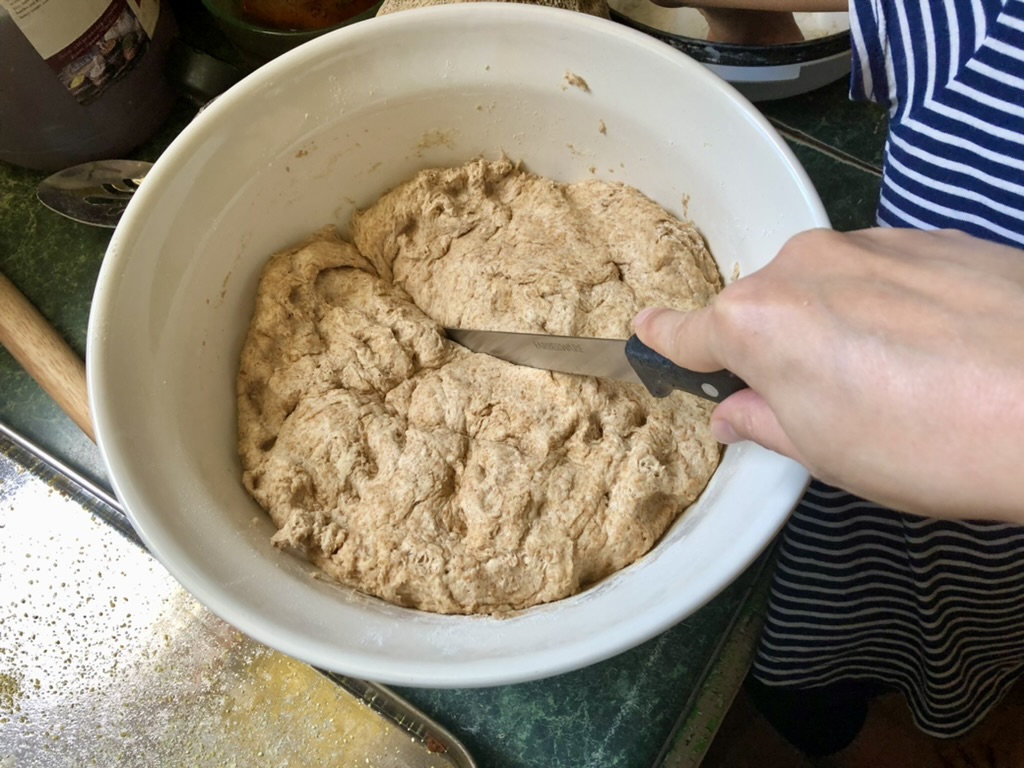
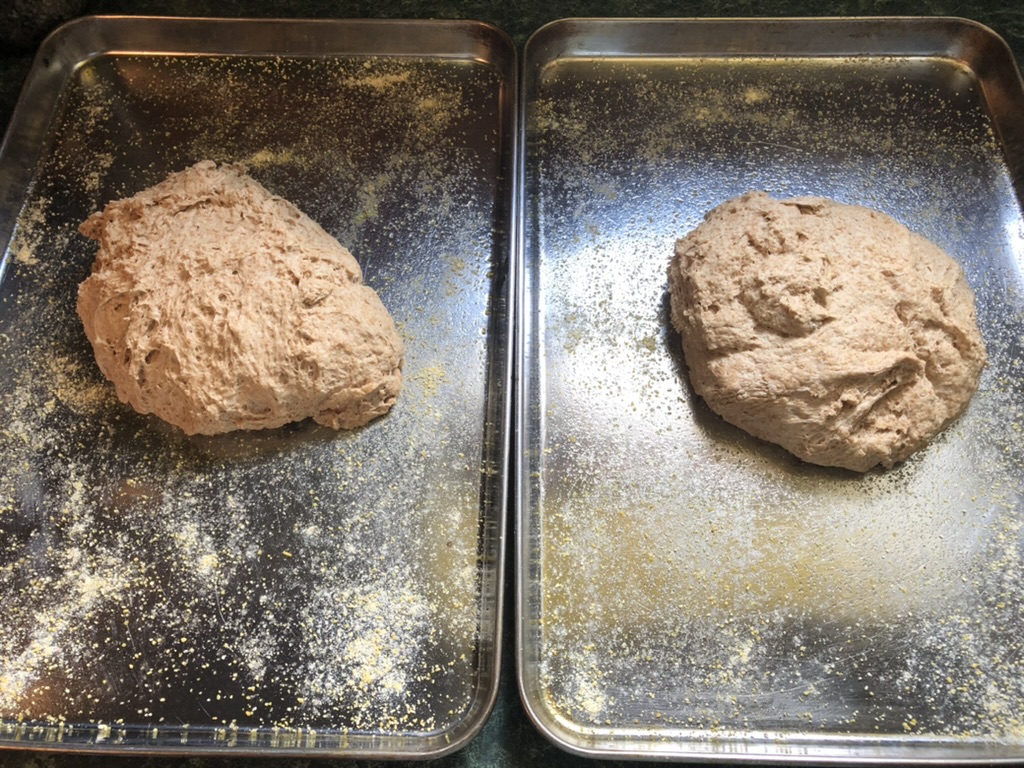
Step 5: Prep your pans and divide up the dough between them.
I dump a little olive oil on each pan (a teaspoon or a tad more), spread it around thinly, then sprinkle with cornmeal. This is wonderful for keeping the pizza from sticking to the pans when you go to serve it!
Now divide up the dough in half. I like to use a large serrated knife to cut the dough and then carefully scoop out one half a time.
There is no rise time to this recipe, just a brief rest while you prep your pans, which makes this a nice quick pizza recipe.

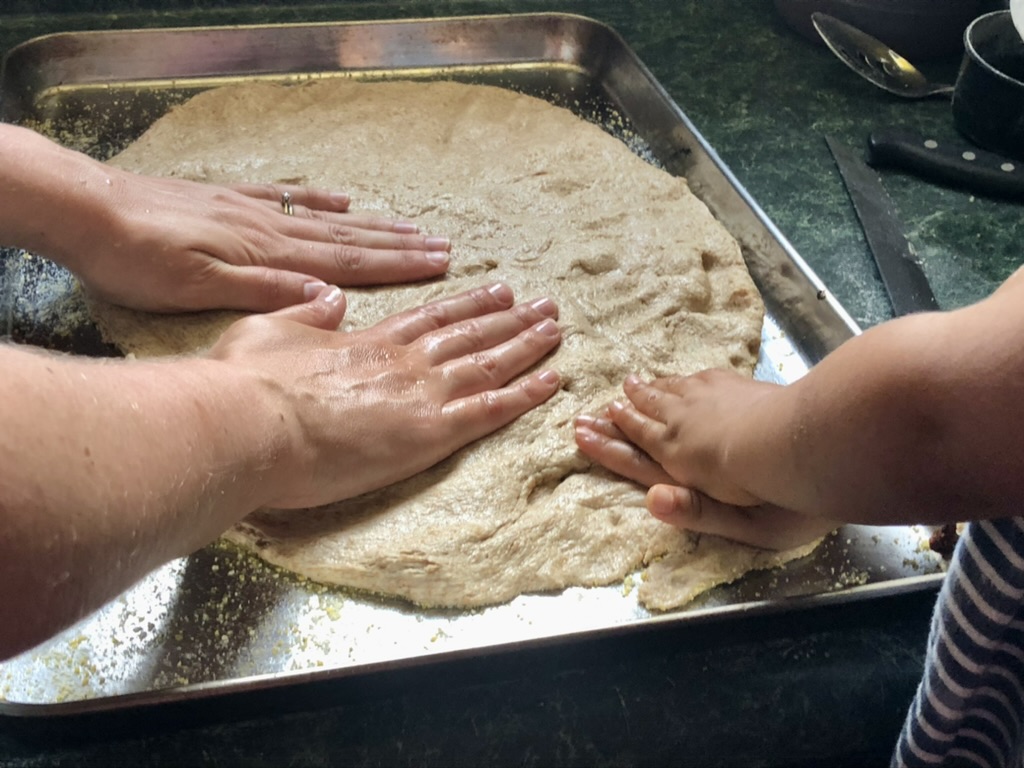
Step 6: Gently spread out your dough and season if desired.
This step is different than a lot of recipes in that you don’t roll it out with a rolling pin. There’s no stretching involved. You actually want to be careful NOT to stretch it or you’ll end up with thin spots and holes.
Pour a little puddle of oil in your hand and rub your hands together to spread it. Now think of your hands as “rolling” out the dough. Apply more pressure with your thumbs and index fingers then roll out to your pinky fingers to slowly spread the dough toward the edges of the pan.
Once it’s spread out evenly, you can lightly sprinkle the dough with garlic powder, basil, and ground thyme. This gives the crust a lovely added flavor, my family loves when I remember to do this! (If you’re family is adjusting from more processed foods to healthy homemade versions you might want to leave it off for now. It can be hard to go from bland processed foods to very flavorful so just know your own family here.)

Step 7: Pre-bake your crust.
Now bake both pizzas in the preheated oven for about 10 minutes. This will ensure that the crust isn’t soggy or doughy in the middle when you’re done and helps the crust hold up better. I find this especially helpful when using such large pans, if I skip this step the middle is often undercooked.
Step 9: Prep remaining toppings.
While the crust is pre-baking, go ahead and finish up your toppings as needed. If you are putting raw vegetables on your pizza that need chopped, do that now. If you already chopped vegetables that need cooked, now is the time to cook them up.
Season your meat if needed. Grate your cheese. (This is a great place to enlist helpers if you haven’t already!)
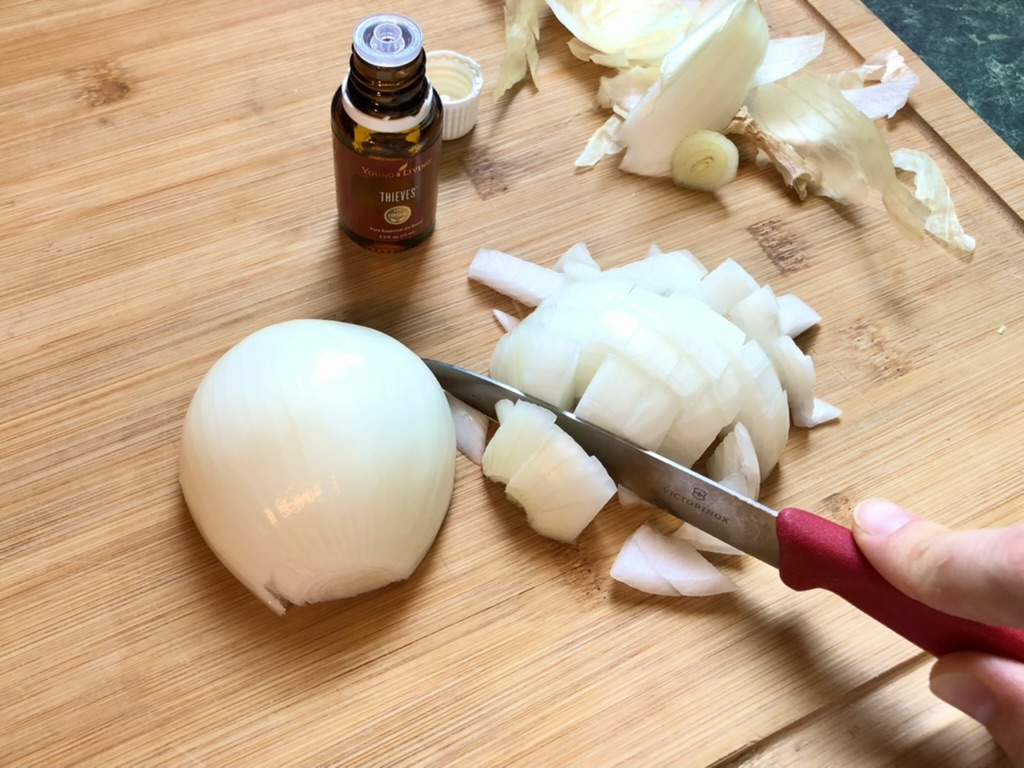
Side note: If anyone else finds themselves crying profusely at onion-cutting, you are not alone! They bother me so badly, and I’ve tried about every trick in the book to ease the tears. Keeping an open bottle of Thieves essential oil very close (right under my nose) is the best remedy I’ve found so far.
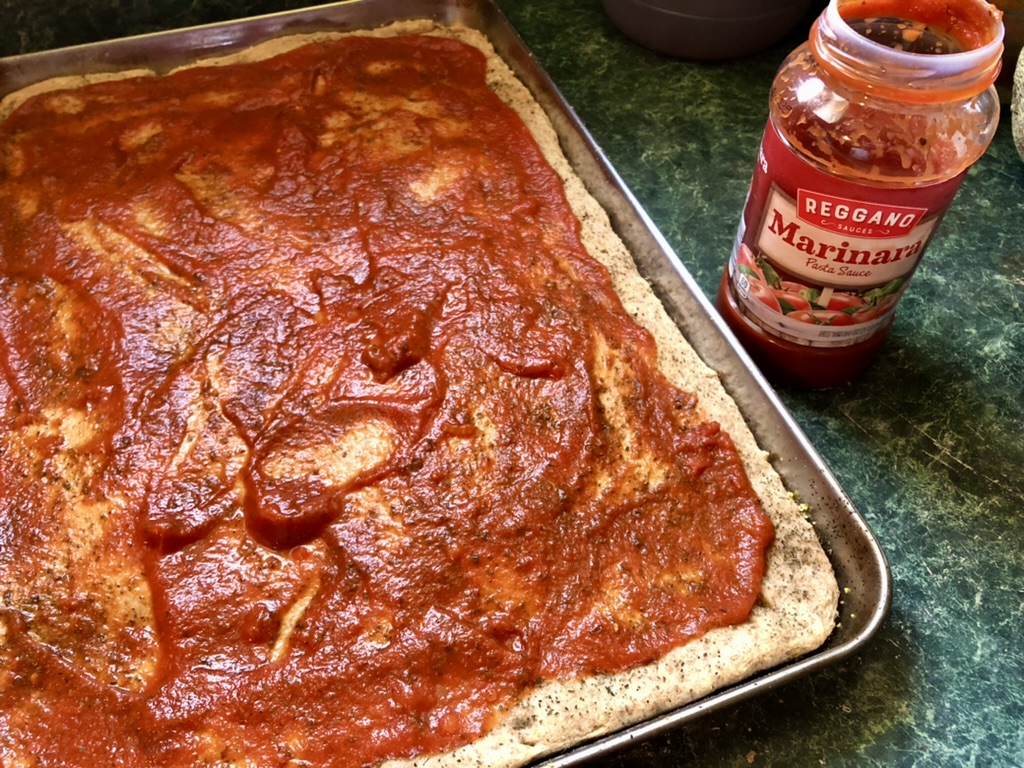
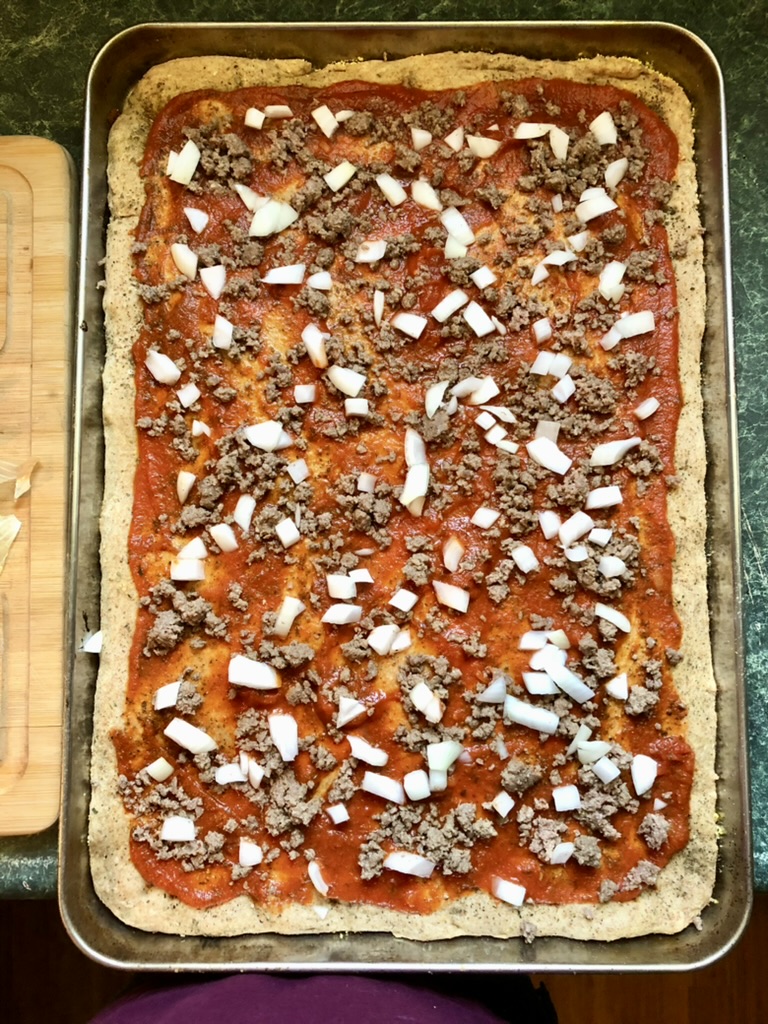
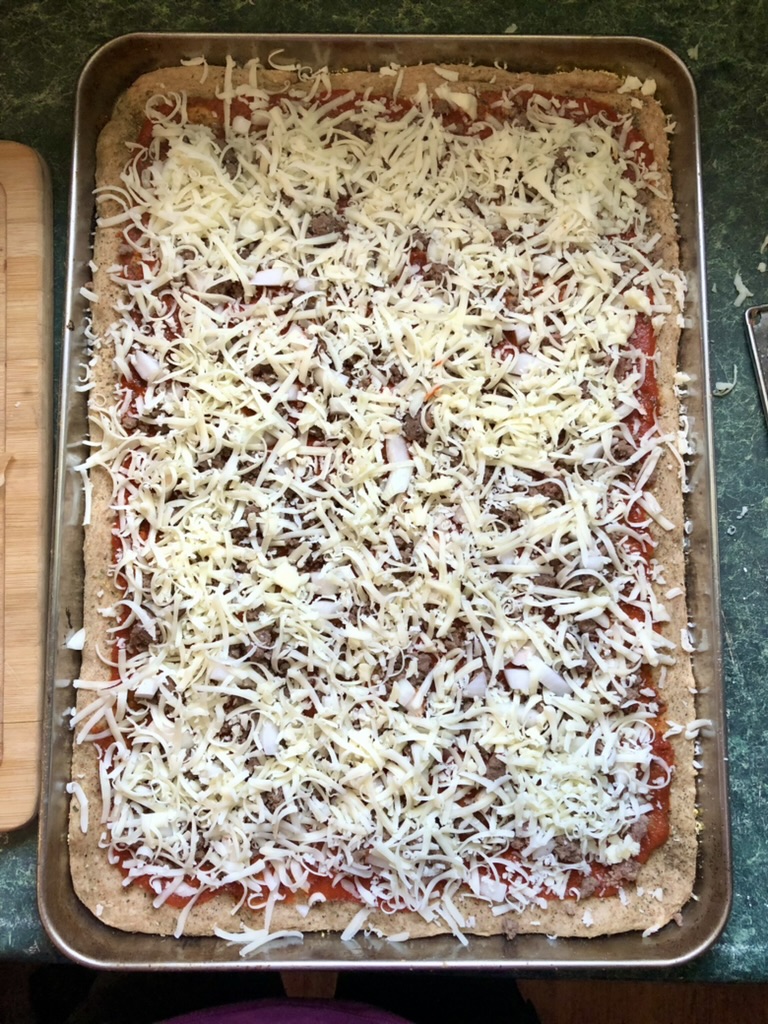
Step 10: Add toppings.
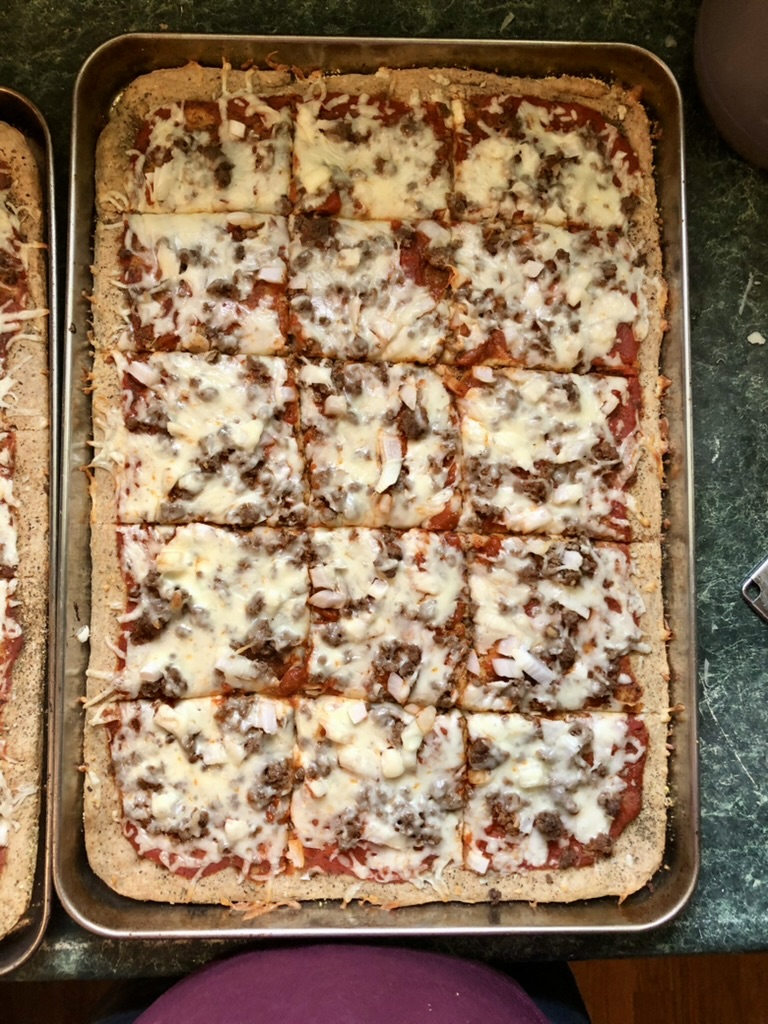
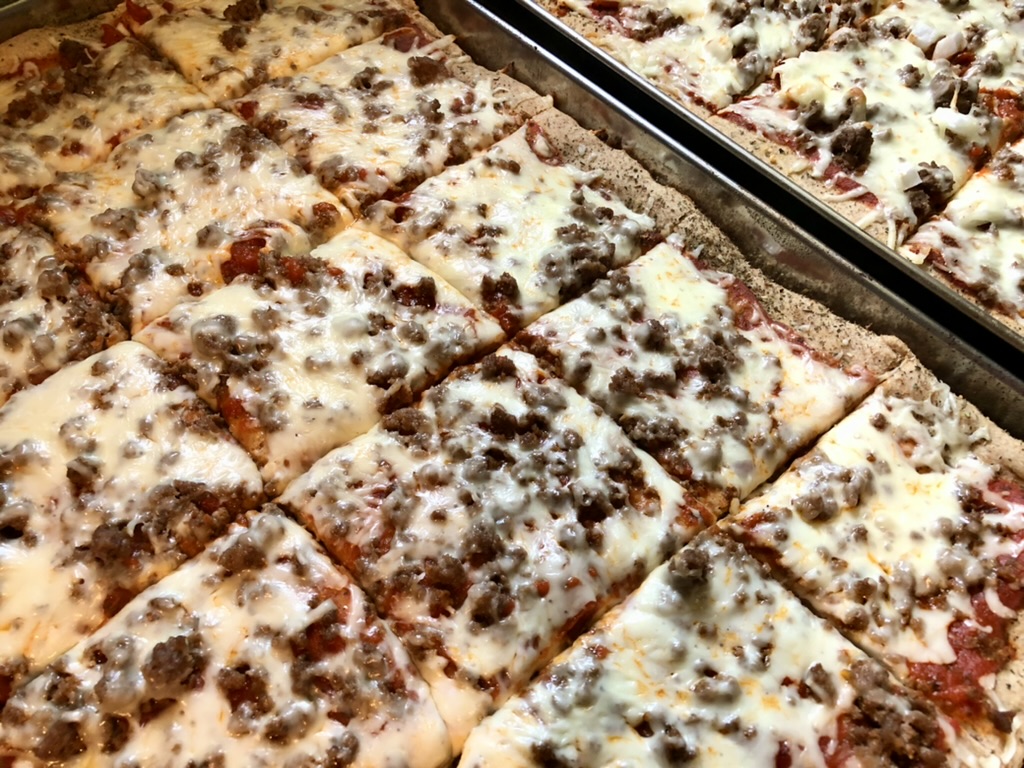
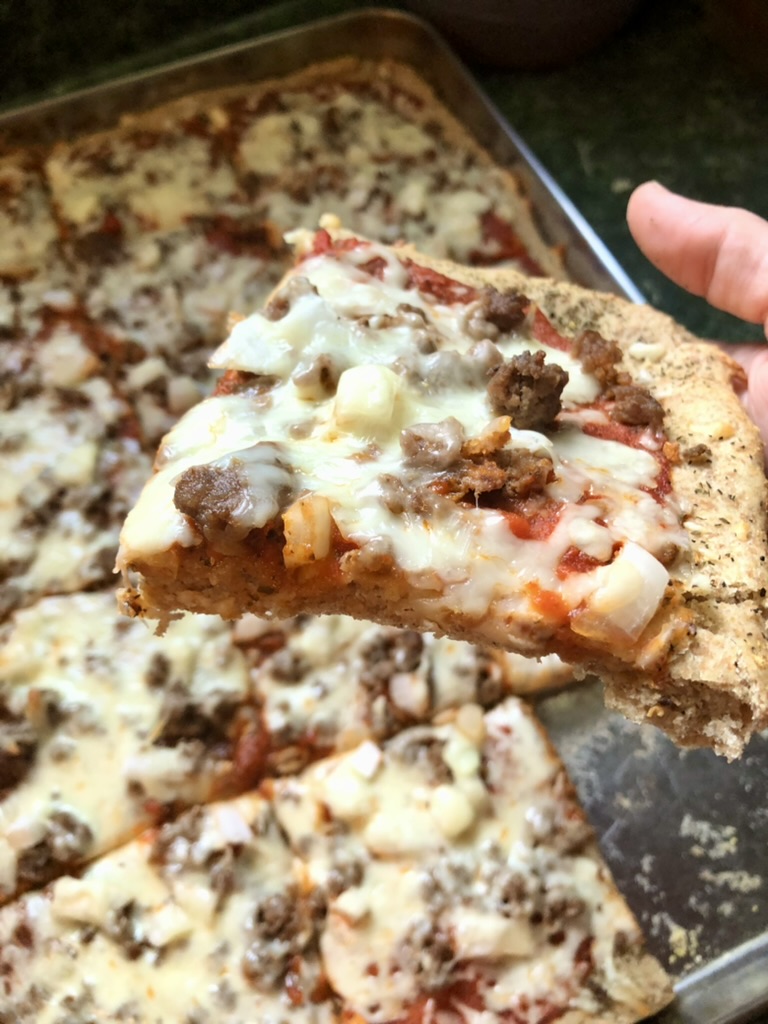
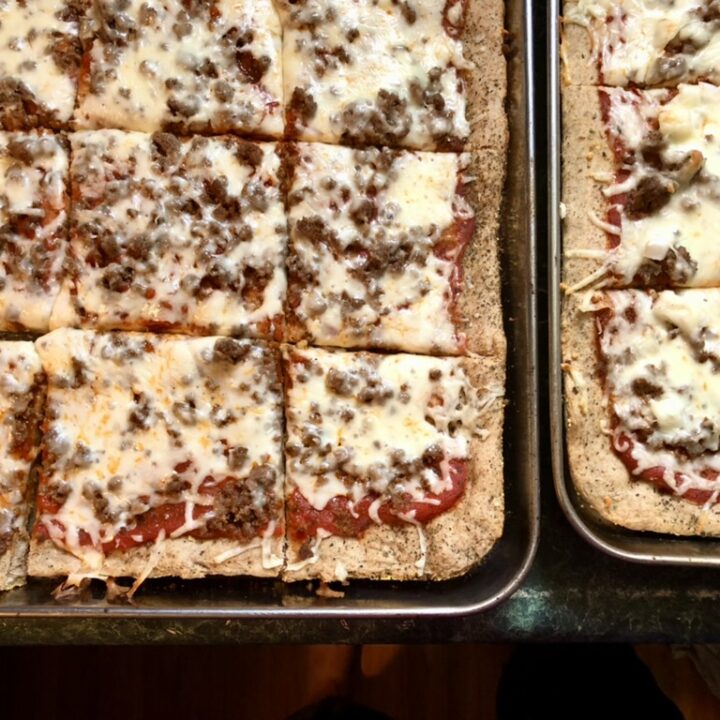
Once the crust is finished pre-baking, you can pull it out and add your toppings right away. I like to put sauce first, then meat and vegetables, then cheese.
Step 11: Bake the pizzas.
Bake them for another 12-15 minutes, until the cheese is all melted. You can optionally broil it for just a couple minutes at the end to brown the cheese, but watch it very carefully if you do.
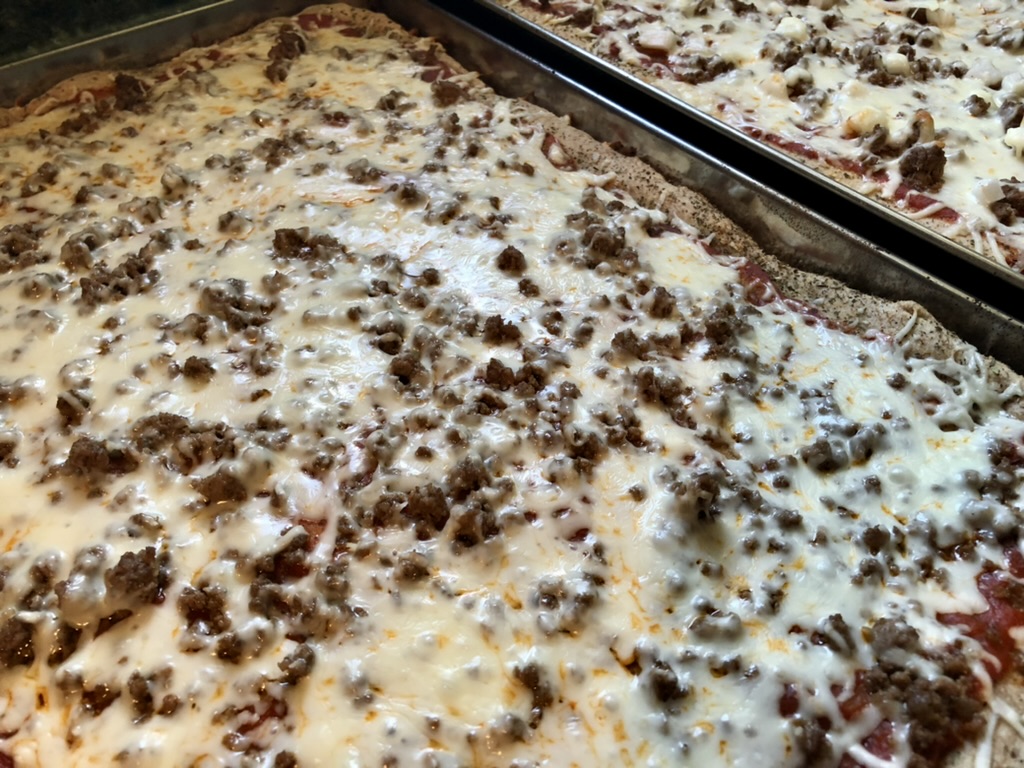
Now cut, serve, and enjoy!
FAQ
What type of flour should I use to make healthy pizza?
You can use whole wheat flour, all-purpose flour, or a combination of the two in this recipe. Starting out I used all or mostly white flour. Now I go between all whole wheat and a combination depending on what sounds good and also if I’m feeding it to company. For pickier eaters at least partial white flour can help them adjust better.
If you do choose to use white flour I highly recommend unbleached and unfortified all purpose flour.
What type of yeast should I use for my pizza?
Active yeast or instant yeast will both work well in this recipe.
What oil should I use to make healthy pizza?
I recommend olive oil because it pairs so nicely with the flavors of pizza. You could also use melted coconut oil if you wanted. You will want to use gently refined coconut oil if you don’t want your crust to have a slight coconut flavor.
How long should pizza dough sit before baking?
This pizza dough doesn’t require any sitting or rise time. It will naturally get a brief rest while you prep your pans but it’s really not necessary at all.
What do you put on the bottom of pizza dough?
I recommend using oil and a light sprinkling of cornmeal under the pizza dough to prevent sticking. I didn’t use to include the cornmeal and had a terrible time with my crusts sticking to the pan. It also made the pans a lot harder to clean afterward.
Olive oil or coconut oil will both work well here.
Alternatively, you could also use parchment paper for quick and easy clean up!
Should you bake pizza crust before adding toppings?
You don’t have to but it does help prevent your pizza being doughy in the middle. It also helps keep the sauce from soaking into the crust and making it soggy.
I have heard of people using olive oil on top of the crust to prevent the sauce from soaking in. You could always try that method as well. I just like to pre-bake because it ensures the crust will be cooked through and be very manageable for all the small hands at my dinner table!
What sauce can I use for my healthy pizza?
There are so many options! You can use something as simple as canned tomato sauce (I did for a long time). Lately I’ve been using an inexpensive marinara sauce from Aldi that has no added sugar. You can find other sugar-free pasta or pizza sauces at the store as well.
You can also use barbecue sauce. Barbecue chicken pizza is a family favorite around here! Our favorite currently is Stubbs brand barbecue sauce. We find it at Walmart and while it’s not sugar free (very hard to find in a barbecue sauce in my experience) it is free of corn syrup.
Alfredo sauce is another option, as well as Ranch or pesto. There are a number of healthy pizza sauce recipes you could try and find what your family like best. (Just typing this out is making me think I need to experiment more with this myself!)
What’s the best cheese to use on healthy pizza?
You can definitely experiment here and find combinations you like! We mainly use mozzarella cheese and I will sometimes add a generous sprinkling of parmesan as well. You could try any cheese here really.
My biggest recommendation here is simply to use block cheese and grate it yourself. Shredded cheese usually has added ingredients that will inhibit the cheese from melting well. Full fat cheese also tends to give a more satisfactory result. I use part-skim mozzarella most of the time though and you can see from the pictures it melts reasonably well across the pizza.
Does the cheese go on pizza first or last?
I used to put the cheese on first and then the toppings and I know that’s very common. Personally I have found that I like it the other way, especially if the meat is fully cooked and the vegetables are not. If you undercook your meat a bit and pre-cook your vegetables they should be fine on top. Well cooked meat and raw veggies have a tendency to dry out a bit cooked quickly on high heat. Putting the cheese on top helps to prevent this.
What toppings are best for healthy pizza?
The sky is the limit here!
As far as meat goes, you can use ground beef, chicken, sausage (regular or turkey), pepperoni (regular or turkey), thin-sliced salami just to get you started. For ground or leftover meat I usually use about 1 pound (or 2 cups cooked) for two large pizzas.
Vegetables give even more variety: peppers (all kinds), onions, spinach and other greens, mushrooms, olives, tomatoes, capers, artichoke hearts, fresh herbs, etc. You can go as plain or as fancy as you want here. I tend to do less vegetables on the pizza and a salad on the side just to keep my main dinner prep simpler. But there are so many fun options to explore here!
How long to cook pizza in oven?
The initial pre-baking takes about 10 minutes at 425 degrees Farenheit. The final bake time with toppings takes an additional 12-15 minutes. This makes the total bake time between 22-25 minutes.
Can healthy homemade pizza dough be frozen for later?
Absolutely! This dough freezes very well. Just divide it up into quart size freezer bags and put it straight in the freezer before it has time to rise. (It will expand some but the freezer slows this process.)
The day you want to bake your pizza, remove the bags from the freezer and let them thaw on the counter, massaging them periodically. As soon as the dough is soft all the way through you can continue with the recipe starting at step 5 above.
How to Make Healthy Pizza at Home
Ingredients
- 3 cups warm water
- 7 teaspoons active yeast
- 1/3 cup olive oil
- 1 tablespoon coconut sugar
- 1 teaspoon of salt
- 8 cups flour (whole wheat, unbleached white, or a combination)
- Garlic powder, basil, and ground thyme (optional)
Instructions
- Proof your yeast. Add your warm water to a large bowl (I find that the hottest my tap water go is perfect for this). Sprinkle the yeast on top, and let sit for about 5 minutes. You want to see it foam up at least in spots. *This is also a good time to preheat the oven to 425°F as well!
- Start prepping any toppings that take time. This is when you'll want to start cooking up any raw meat for topping the pizza. If you want to cook any of your vegetable toppings before putting them on your pizza you might want to go ahead and chop them now.
- Add the remaining ingredients to your dough. Add the olive oil, coconut sugar, salt and flour.
- Stir well.
- Prep your pans with olive oil and a sprinkling of cornmeal and divide up the dough between them.
- Gently spread out your dough and season if desired. Be careful NOT to stretch it or you'll end up with thin spots and holes. Pour a little puddle of oil in your hand and rub your hands together to spread it. Now think of your hands as "rolling" out the dough. Apply more pressure with your thumbs and index fingers then roll out to your pinky fingers to slowly spread the dough toward the edges of the pan. Once its spread out evenly, you can lightly sprinkle the dough with garlic powder, basil, and ground thyme.
- Bake the crust for 10 minutes.
- Prep remaining toppings. While the crust is pre-baking, go ahead and finish up your toppings as needed. If you are putting raw vegetables on your pizza that need chopped, do that now. If you already chopped vegetables that need cooked, now is the time to cook them up. Season your meat if needed. Grate your cheese.
- Add toppings to crust. Once the crust is finished pre-baking, you can pull it out and add your toppings right away. I like to put sauce first, then meat and vegetables, then cheese.
Pin it For Later

Leave a Reply